Manage working times in jobs
At Administration > Time Recording > General you can set how employees are allowed to record times, if these times have to be approved, if they can be changed afterwards and much more. Additionally, you can define in the user groups that schedulers and project managers have the right to approve working times for employees in their job.
Working hours main job
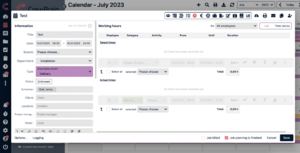
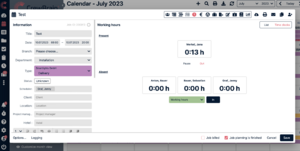
In the section working hours of your job you first see the target and actual times for the main job. This is the list view. At the top, you can use a dropdown to select whether you want to enter or view (depending on access rights) the working times of the main job for all employees or only for a specific one. Besides the list view, you also find the time clock surface to clock in and out each employee (find more information below).
List
If you look at the list view of working times, you can enter the target and actual times separately. In both cases, fill in the fields highlighted in gray. The activity is optional depending on the settings (Administration > Time recording > General > Tasks / Description of working time). Important are the date and the start and end time.
Target times
Enter the time you estimate for a specific task here. If, for example, an employee should already be there half an hour before the start of the shift, this can be regulated via the target times. Under Administration > Time recording > General > Tasks / Description of working time you can choose how and if the task should be recorded. You can also take over the estimated times from other employees or use them for all employees.
If you move the mouse over the tick icon, you will see who approved the working times and when. If you move it over the keyboard icon, you will see who manually entered the time requirements and when. If you click on copy, the exact same line - with activity and work period - will appear again directly below. This way, you don't have to re-enter everything each time you have the same time requirements.
If you click the three dots, you will get an overview of the working time of the respective employee for the respective job.
By clicking the red cross you delete the respective line with working times.
Below the line you can select all recorded working times and copy them, use them for all employees or delete them.
Actual times
The actual times, meaning the time actually spent on a certain activity, can be recorded either manually or by time clock. You can see how it was recorded by the keyboard icon (recorded manually) or the screen icon (recorded by time clock). Move the mouse over these icons to see who recorded the times and when. Depending on the settings (Administration > Time Recording > General) the entered times still have to be approved. If you click on copy, the exact same line - with activity and work period - will appear again directly below. This way, you don't have to re-enter everything every time you have the same time specifications.
If you click on the three dots, you will get an overview of the working time of the respective employee for the respective job.
By clicking on the red cross you delete the respective line with working times.
Below the line you can select all recorded working times and copy them, use them for all employees or delete them.
Time clocks
Using the time clock (top right corner, next to "list"), each employee can clock in and clock out. This results in an exact time recording, which is automatically saved in the project for the respective employee as actual time. To do this, the employee clicks on the field with his name, the frame of which turns yellow. If he then clicks on 'In' the time clock starts counting. The employee can choose whether the time is working time, driving time (driver or passenger) or school or training time. The time categories can be adjusted manually via Administration > Time Recording > Time Categories.
The time clock will now continue to run in the background until the employee clicks on the box with his/her time, so that it turns yellow again, and he/she then clicks on 'Pause' or 'Out'.
If the working time recording with flexitime account is defined as the payroll type for the employee, breaks are automatically deducted - depending on the setting.
Working hours sub jobs
To enter the working times for the sub jobs of a main job, go to the first drop-down field ("Please select") in the list view in the main job and select the corresponding sub job there. Then proceed exactly as above in "Working times main job".
Working times for sub-jobs can also be entered directly in the sub jobs. To do this, click on the "Sub jobs" icon. In the overview, you will see a clock icon in front of each employee. Click on it to manually enter the working times as above under "Working times main job".
If working times have already been recorded for an employee, you can see this by the color of the clock:
green = working time (actual time) has been recorded
yellow = target times have been recorded
red = the recorded working times deviate strongly from the target times
black = no working time has been recorded yet
If you move the mouse over the colored clock, a window opens and shows information about the target and actual times of the employee and who has recorded them, when and how. Click on "Edit working hours" to view or edit the employee's times for this subjob - depending on access rights.

