Employees: Difference between revisions
No edit summary |
No edit summary |
||
| Line 78: | Line 78: | ||
Here you can assign work instructions or declarations of consent to your employees. If it is necessary, you can have them confirmed by your employees. This gives you a quick overview of which instructions and confirmations the individual employees have provided and which may still be outstanding. You can add further instructions and confirmations under ''Administration > Staff > Work Instructions / Confirmations''.[[File:First aid book - Employees.png|thumb|220x220px|First aid book - Employees]] | Here you can assign work instructions or declarations of consent to your employees. If it is necessary, you can have them confirmed by your employees. This gives you a quick overview of which instructions and confirmations the individual employees have provided and which may still be outstanding. You can add further instructions and confirmations under ''Administration > Staff > Work Instructions / Confirmations''.[[File:First aid book - Employees.png|thumb|220x220px|First aid book - Employees]] | ||
=== First aid book === | === First aid book === | ||
To activate the first aid book and to ensure, that every employee is able to add entries please go to Administration > Work safety > First aid book. Then please set a mark at "Track work accidents in a first aid book. You also have the possibility to define the period after which the entries should be deleted. | To activate the first aid book and to ensure, that every employee is able to add entries please go to ''Administration > Work safety > First aid book''. Then please set a mark at "Track work accidents in a first aid book. You also have the possibility to define the period after which the entries should be deleted. | ||
Now you have the first aid book in the profile of each employee in the base data. To create a new entry, please click "Show more" and then "add further entry". A new tab will open where you can enter all necessary information about the accident or illness of an employee. | Now you have the first aid book in the profile of each employee in the base data. To create a new entry, please click "Show more" and then "add further entry". A new tab will open where you can enter all necessary information about the accident or illness of an employee. | ||
=== Covid-19 tests === | === Covid-19 tests === | ||
To track Covid-19 tests in CrewBrain for your employees, please activate this feature via Administration > Settings > Work safety > Covid-19 tests. From now on, you can enter new test results or information about a vaccination or infection here. Back in your base data of the employee, you'll now find a section for Covid-19 tests. You see a list with all tests (and results) as well as vaccinations of your employee. You can add tests by clicking on "show more" and then "add further entry". | To track Covid-19 tests in CrewBrain for your employees, please activate this feature via ''Administration > Settings > Work safety > Covid-19 tests''. From now on, you can enter new test results or information about a vaccination or infection here. Back in your base data of the employee, you'll now find a section for Covid-19 tests. You see a list with all tests (and results) as well as vaccinations of your employee. You can add tests by clicking on "show more" and then "add further entry". | ||
== Driver's log == | == Driver's log == | ||
This is where you get an overview of all journeys the employee has made. You'll see the starting and ending time, the duration, the distance and the place (if it has been tracked via GPS). | [[File:Employee - driver's log.png|thumb|219x219px|Driver's log - Employees]] | ||
This is where you get an overview of all journeys the employee has made. You'll see the starting and ending time, the duration, the distance and the place (if it has been tracked via GPS). To add a new entry, just click on "Add driver's log". By using the pencil icon, you can easily modify existing entries later on. | |||
It is also an option to register driving times with our [[Time Clock|time clock]] in the app. Just choose driving time when clocking in. You will be asked about the start km and also the end km once you have arrived and clock out. All journeys registered in the driver's log can directly be transferred to the [[traveling expenses]]. | |||
== Equipment == | == Equipment == | ||
Here you can track your equipment. Add equipment which you handed over to your employee. This list will help you to keep the overview. You can check when something was handed out, if and when it has been returned and you can even set a date for the next inspection (if necessary). In case you define an inspection date, your employee will get a notification about that. | |||
When you add new equipment to this list, it is also possible to upload a photo of the item. | |||
If you want to add more owners to choose for your equipment, please do this under ''Administration > Staff > Equipment > Owner'' | |||
The tab shows different filters to use, which will facilitate to search within this list. You can set filters for the category, the serial or inventory number, safety checks, description, manufacturer and/or status. | |||
If an item is passed on to another employee, you can "edit" the corresponding equipment and enter the other employee instead of the old one. If the same work equipment is issued to several employees, you can copy it and then move it to another employee. | |||
=== Inspection === | === Inspection === | ||
It is possible to specify inspection intervals or inspections for issued work equipment. Just click on "Add inspection" when you have entered an item. Now please enter the type of inspection, the date of inspection and the name of the inspector. You can also add notes and upload documents. At the bottom you can also define a period after which the next inspection should take place. The employee will get a notification about that. The result can be entered by anybody who can also create the inspections. | |||
[[File:Base data - employee - print view - request for exemption.png|thumb|220x220px|Print view - Request for exemption]] | |||
== Print view (PDF) == | |||
On the upper right side you can show and print out different PDFs concerning the employee. Besides the profile you can show the data information (contains, in addition to personal information, emergency contacts, certificates, hours worked, etc.), a list of equipment, the driver's log, the employment contract or the request for exemption for mini jobbers. | |||
The employment contract should be adapted under ''Administration > System > Text templates''. | |||
Latest revision as of 08:59, 15 June 2023
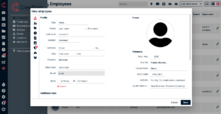
In the base data you can add new and make changes to existing employees. So first, please click on base data. To get an overview of all your employees, please click on "Employees" in the navigation bar or on "show all" in the employee's box. By default, you will see all employees in the grid view. It is possible to switch it to the table view (list view) via the corresponding icon. If you click on one one the employees you'll see the individual information. As an administrator you can edit the information as well as you have the relevant user rights.
New employee
Click on "New employee" or, if you see already the overview of your existing employees, please click on the plus symbol at the top of the page. A new window will open, where you can enter all relevant information for your employee. Your employee can even enter the information himself once you entered his name and mail address and added him to a user group (Access & Settings). He will get a mail with his login data then. (You can define the access rights of the different user groups under Administration > General > User groups.)
Profile
Enter the personal information of the employee here. To do this, fill in the given fields. Under Administration > Staff > Additional data, you can create additional data fields. You can store languages and notes, as well as upload a photo of the employee. In addition, you can see the personnel number and assign your employee to a location or department, if necessary.
Access & Settings
Here is where you define if the employee has access or not.
An active employee, who you want to plan and communicate with in jobs should always be set to "Access with the following user groups".
If you choose "No access" for an employee, this person can only be requested and booked informatively (for you). No mails will be send.
User groups
Assign your employee to one or more user groups here. With the assignment to the different user groups, the employees get corresponding access rights. The access rights of each user group are listed under Administration > General > User groups.
The administrator has the right to modify the existing groups and to create new user groups.
It is possible to assign an employee to more than one user group.
When it comes to the point, that he has two different rights (as a result of being in two different user groups) regarding the same issue, the group with the "highest" right applies. So if a right in one of the groups is set to "Write", he has right to write/change information, even though the right for the same issue is set to "Read" in the other user group.
Reset password
If an employee has forgotten his password, you can reset the password here. You also find the login name here.
Notifications
Here you add an additional e-mail address for sending automatically copies of all notifications.
Enter an Outlook e-mail address. Outlook-compatible appointments are transferred directly to your Outlook calendar. The mail address entered here may be identical to the mail address registered in the account.
You can also decide for which changes and information a notification is send out via e-mail or push notification. In some cases it might not be necessary to get a notification for minor changes. But please make sure, that your employees will receive all important notifications. Your employees can configure the notification settings themselves in the section "My Account".
Categories & Certificates
Categories
Assign categories to your employees. Categories could be the different working activities. This will help you to sort your employees and to find the employee who fits best for the job you plan. You can also mark the skill level for each employee. To create new categories, please go to Administration > Staff > Categories.
Certificates
Different certificates can be stored for each employee. An example would be the proof of health insurance. There are some default categories for the certificates. If those don't correspond to yours, you can select "other certificate" in the drop down menu for description and name it yourself. It is also possible to add new categories by going to Administration > Staff > Certificates. Here you can define which certificates are mandatory for employees and for whom they apply. Then, for example, you will automatically receive a message when a request is sent if a certificate is missing or expired.
You can specify the validation period of the certificate, upload a document or enter comments.
In the section "My Account" your employee can upload certificates himself. They need to be checked and approved. Who is in charge of this, depends on user rights.
Personnel planning
If necessary, an employee (e.g. technical user) can be hidden from the personnel planning views using this checkbox.
Statement & Time recording
Here you define the statement type. You have the following options:
- Statements according to hour or flat rate (job-based) - e.g. for freelancers or mini jobbers
- Time recording with flextime account (day based) - e.g. for permanent employees
- No accounting
One employee can be assigned to different statement types during different periods. Please make sure to create a new period every time you change the statement type. All modification concern the whole period. So if you would just change the statement type in an existing period, the new statement type would be considered for the whole period, so even for past jobs. Just click on add further period, select the new statement type and fill in the necessary information. If you want to save time you don't have to do this for each employee. You can also use a period from another employee or use the current period as template and then just make the necessary changes.
Documents
By clicking on "Add document" you can upload documents like application documents, statements of salary, the curriculum vitae, certificates and so on. Simply select "Other document" in the dropdown and enter a new name for the category, if the default ones don't fit. Another option to add new categories for documents is by going to Administration > Staff > Documents. You can name the document, add descriptions and/or send it directly to your employee.
To find documents easier, they can be filtered. You could filter for "Category", "Name", "Period of time", "Released" and "Read". Released means released to the employee so that he can read or download this document.
If you have already uploaded a document, you can open and read it directly by clicking on the symbol of the document. The employee will see the document only after it has been released.
Emergency contacts
Persons who should be contacted in case of an emergency during work are listed here. The different user groups (Administration > General > User groups) help you to control who has access to the emergency contacts and who doesn't. This means that colleagues can also access these contacts in emergencies. For this purpose, the "Access to emergency contacts in acute emergencies" must be set to "read" under Administration > General > User groups > Base data.
The colleague will go to Base data > Emergency contacts and then click on "Show emergency contacts". For privacy reasons, the system asks the employee whether it really is an emergency. If he answers yes, all administrators as well as the affected employee are informed about the retrieval of the data and the respective colleague receives the contact information.
Work safety
Work instructions / Confirmations
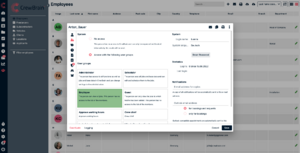
Here you can assign work instructions or declarations of consent to your employees. If it is necessary, you can have them confirmed by your employees. This gives you a quick overview of which instructions and confirmations the individual employees have provided and which may still be outstanding. You can add further instructions and confirmations under Administration > Staff > Work Instructions / Confirmations.
First aid book
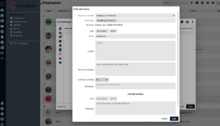
To activate the first aid book and to ensure, that every employee is able to add entries please go to Administration > Work safety > First aid book. Then please set a mark at "Track work accidents in a first aid book. You also have the possibility to define the period after which the entries should be deleted.
Now you have the first aid book in the profile of each employee in the base data. To create a new entry, please click "Show more" and then "add further entry". A new tab will open where you can enter all necessary information about the accident or illness of an employee.
Covid-19 tests
To track Covid-19 tests in CrewBrain for your employees, please activate this feature via Administration > Settings > Work safety > Covid-19 tests. From now on, you can enter new test results or information about a vaccination or infection here. Back in your base data of the employee, you'll now find a section for Covid-19 tests. You see a list with all tests (and results) as well as vaccinations of your employee. You can add tests by clicking on "show more" and then "add further entry".
Driver's log
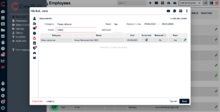
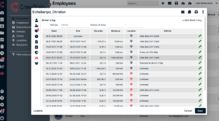
This is where you get an overview of all journeys the employee has made. You'll see the starting and ending time, the duration, the distance and the place (if it has been tracked via GPS). To add a new entry, just click on "Add driver's log". By using the pencil icon, you can easily modify existing entries later on.
It is also an option to register driving times with our time clock in the app. Just choose driving time when clocking in. You will be asked about the start km and also the end km once you have arrived and clock out. All journeys registered in the driver's log can directly be transferred to the traveling expenses.
Equipment
Here you can track your equipment. Add equipment which you handed over to your employee. This list will help you to keep the overview. You can check when something was handed out, if and when it has been returned and you can even set a date for the next inspection (if necessary). In case you define an inspection date, your employee will get a notification about that.
When you add new equipment to this list, it is also possible to upload a photo of the item.
If you want to add more owners to choose for your equipment, please do this under Administration > Staff > Equipment > Owner
The tab shows different filters to use, which will facilitate to search within this list. You can set filters for the category, the serial or inventory number, safety checks, description, manufacturer and/or status.
If an item is passed on to another employee, you can "edit" the corresponding equipment and enter the other employee instead of the old one. If the same work equipment is issued to several employees, you can copy it and then move it to another employee.
Inspection
It is possible to specify inspection intervals or inspections for issued work equipment. Just click on "Add inspection" when you have entered an item. Now please enter the type of inspection, the date of inspection and the name of the inspector. You can also add notes and upload documents. At the bottom you can also define a period after which the next inspection should take place. The employee will get a notification about that. The result can be entered by anybody who can also create the inspections.
Print view (PDF)
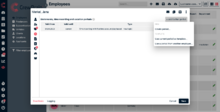
On the upper right side you can show and print out different PDFs concerning the employee. Besides the profile you can show the data information (contains, in addition to personal information, emergency contacts, certificates, hours worked, etc.), a list of equipment, the driver's log, the employment contract or the request for exemption for mini jobbers.
The employment contract should be adapted under Administration > System > Text templates.
