Employees
In the base data you can add new and make changes to existing employees. So first, please click on base data. To get an overview of all your employees, please click on "Employees" in the navigation bar or on "show all" in the employee's box. By default, you will see all employees in the grid view. It is possible to switch it to the table view (list view) via the corresponding icon. If you click on one one the employees you'll see the individual information. As an administrator you can edit the information as well as you have the relevant user rights.
New employee
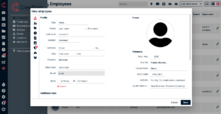
Click on "New employee" or, if you see already the overview of your existing employees, please click on the plus symbol at the top of the page. A new window will open, where you can enter all relevant information for your employee. Your employee can even enter the information himself once you entered his name and mail address and added him to a user group (Access & Settings). He will get a mail with his login data then. (You can define the access rights of the different user groups under Administration > General > User groups.)
Profile
Enter the personal information of the employee here. To do this, fill in the given fields. Under Administration > Staff > Additional data, you can create additional data fields. You can store languages and notes, as well as upload a photo of the employee. In addition, you can see the personnel number and assign your employee to a location or department, if necessary.
Access & Settings
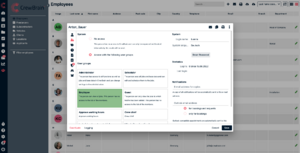
Here is where you define if the employee has access or not.
An active employee, who you want to plan and communicate with in jobs should always be set to "Access with the following user groups".
If you choose "No access" for an employee, this person can only be requested and booked informatively (for you). No mails will be send.
User groups
Assign your employee to one or more user groups here. With the assignment to the different user groups, the employees get corresponding access rights. The access rights of each user group are listed under Administration > General > User groups.
The administrator has the right to modify the existing groups and to create new user groups.
It is possible to assign an employee to more than one user group.
When it comes to the point, that he has two different rights (as a result of being in two different user groups) regarding the same issue, the group with the "highest" right applies. So if a right in one of the groups is set to "Write", he has right to write/change information, even though the right for the same issue is set to "Read" in the other user group.
Reset password
If an employee has forgotten his password, you can reset the password here. You also find the login name here.
Notifications
Here you add an additional mail address for sending automatically copies of all notifications.
Enter an Outlook mail address. Outlook-compatible appointments are transferred directly to your Outlook calendar. The mail address entered here may be identical to the mail address registered in the account.

