Calender views: Difference between revisions
No edit summary |
|||
| Line 14: | Line 14: | ||
== Weekly view == | == Weekly view == | ||
[[File:Calendar Weekly view 2.png|thumb|200x200px|Weekly view]] | |||
In the weekly view you can directly see some information about your jobs. You define which information this is via 'Customize week view'. You will find this function at the very bottom of the tab on the left. Here you can also decide whether a screen with more detailed information should appear when the mouse is moved over the respective job. | In the weekly view you can directly see some information about your jobs. You define which information this is via 'Customize week view'. You will find this function at the very bottom of the tab on the left. Here you can also decide whether a screen with more detailed information should appear when the mouse is moved over the respective job. | ||
| Line 20: | Line 20: | ||
== Bar view == | == Bar view == | ||
[[File:Calendar Bar view.png|thumb|200x200px|Bar view]] | |||
In the navigation, the bar view can be displayed from the perspective of employees, jobs, schedulers, project managers or time recording. In the day view, it offers an overview divided into hours in each case, which can be expanded to a weekly or monthly view. To change the view, click on "Week" or "Month" in the left menu under the "Bar View" section. It also shows how many bookings there are in this period for each employee and how many hours these bookings comprise (according to calculation). | In the navigation, the bar view can be displayed from the perspective of employees, jobs, schedulers, project managers or time recording. In the day view, it offers an overview divided into hours in each case, which can be expanded to a weekly or monthly view. To change the view, click on "Week" or "Month" in the left menu under the "Bar View" section. It also shows how many bookings there are in this period for each employee and how many hours these bookings comprise (according to calculation). | ||
| Line 28: | Line 28: | ||
== Planning == | == Planning == | ||
[[File:Calendar Planning.png|thumb|203x203px|Planning]] | |||
Attention, this is a view for advanced users. It should be used only when you have already entered jobs and employees and know exactly how you want to work with the three levels (project, main job, subjob). | Attention, this is a view for advanced users. It should be used only when you have already entered jobs and employees and know exactly how you want to work with the three levels (project, main job, subjob). | ||
| Line 42: | Line 42: | ||
== Overviews == | == Overviews == | ||
By default, you will get a monthly overview here, but you can set it to a desired time frame - by clicking on the dates. By setting the corresponding checkmarks in the overviews, you can display employees, freelancers, subcontractors, vehicles and rooms. Using the additional filters or the checkmark at "Assort" you can find what you are looking for even faster. | By default, you will get a monthly overview here, but you can set it to a desired time frame - by clicking on the dates. By setting the corresponding checkmarks in the overviews, you can display employees, freelancers, subcontractors, vehicles and rooms. Using the additional filters or the checkmark at "Assort" you can find what you are looking for even faster. | ||
[[File:Calendar Overviews Availability.png|thumb|193x193px|Overviews Availability]] | |||
You can get the overview either in terms of availability, jobs, time recording or time off. There is also a grid view. | You can get the overview either in terms of availability, jobs, time recording or time off. There is also a grid view. | ||
=== Availability === | === Availability === | ||
This is where you get a monthly overview of vacations/holidays, the number of jobs per day, the daily staff requirements and which employees, freelancers, subcontractors or vehicles are booked, available or requested for which job and when (depending on the filters set). The respective colored background indicates the status, as explained below in the caption. Regarding the jobs, the number of individual jobs on the respective date is displayed. If you click on the numbers with a grey background, the individual jobs are displayed. You can open their window by clicking on them again. This not only gives you its information, but also allows you to edit it (depending on access rights). | This is where you get a monthly overview of vacations/holidays, the number of jobs per day, the daily staff requirements and which employees, freelancers, subcontractors or vehicles are booked, available or requested for which job and when (depending on the filters set). The respective colored background indicates the status, as explained below in the caption. Regarding the jobs, the number of individual jobs on the respective date is displayed. If you click on the numbers with a grey background, the individual jobs are displayed. You can open their window by clicking on them again. This not only gives you its information, but also allows you to edit it (depending on [[access rights]]). | ||
If you move the mouse over the individual jobs of employees, freelancers, subcontractors or vehicles, the title of the job is displayed. If you click on it, its screen for further information can be opened and edited (depending on the access rights). | If you move the mouse over the individual jobs of employees, freelancers, subcontractors or vehicles, the title of the job is displayed. If you click on it, its screen for further information can be opened and edited (depending on the [[access rights]]). | ||
[[File:Calendar Overviews Jobs.png|thumb|193x193px|Overviews Jobs]] | |||
You can add vacation for the respective employee as an administrator by clicking on a field that is not colored. You can differentiate between vacation, time off, school/training or sick leave (vacation categories can be defined under Administration > Vacation & Absence) and if desired, approved directly. The Freelancers can simply be set to "Not available". | You can add vacation for the respective employee as an administrator by clicking on a field that is not colored. You can differentiate between vacation, time off, school/training or sick leave (vacation categories can be defined under ''Administration > Vacation & Absence'') and if desired, approved directly. The Freelancers can simply be set to "Not available". | ||
=== Jobs === | === Jobs === | ||
On the left you will find all jobs that are scheduled for the selected month. Jobs that are already fully scheduled are green, jobs which can still be modified are red. By clicking on the respective job you get its information and can edit it, if you have the required access rights. | On the left you will find all jobs that are scheduled for the selected month. Jobs that are already fully scheduled are green, jobs which can still be modified are red. By clicking on the respective job you get its information and can edit it, if you have the required [[access rights]]. | ||
[[File:Calendar Overview Grid view.png|thumb|193x193px|Grid view]] | |||
=== Grid view === | === Grid view === | ||
Here you get an overview of all resources and their daily jobs with the respective start and end times based on the job or the default times defined for the employee. The view is endless, so you can scroll into the future as you wish. | Here you get an overview of all resources and their daily jobs with the respective start and end times based on the job or the default times defined for the employee. The view is endless, so you can scroll into the future as you wish. | ||
=== Time recording === | |||
[[File:Calendar Overview Time recording.png|thumb|193x193px|Time recording]] | |||
This is where you see the working hours of each employee. The different colors are explained at the bottom of this view. | |||
=== Time-Off === | |||
This view shows the time-off of your employees, freelancers and subcontractors. Any holidays entered in the system will be displayed at the top. As usual, you can control the selection by using filters. Via "filter employees", for example, it is possible to filter by one or more employees or by individual categories. | |||
[[File:Calendar Overviews Time-Off.png|thumb|193x193px|Time-Off]] | |||
The color is explained at the bottom of the screen - depending on the selected view. You have the possibility to choose between "Status" and "Category" at the bottom of the screen. In the "Status" view, you can see the status of the leave request. In the "Category" view you can see if it is a vacation, a training or something else. You can choose different colors for these categories under ''Administration > Time-Off & Absence > Categories''. | |||
If you click on a colored field, the screen for editing the leave request opens, depending on your [[access rights]]. If you click on a field that is still empty, you can directly add holidays, time off, school/training or a sick note. For individual configuration of the leave categories go to ''Administration > Time off & Absence > Categories''. | |||
For each employee, the available number of leave days is displayed at the end of the table. These have to be defined in the [[base data]] before. | |||
You also have the option of printing a monthly absence overview for each employee. In addition to the calendar overview, the print view contains a list which shows all absences in detail. | |||
Latest revision as of 11:05, 19 May 2023
The calendar is the heart of the software and always provides exactly the overview you need using a wide variety of views and filters. In each view you will find four icons in the upper right corner that allow you to create a new calendar entry, search for an entry, print the calendar or download it. In each view you can select the desired date in the upper right corner. Depending on the view, you select the year, month, calendar week or day. By selecting forward or backward at 'Today' you can move through the years, months, weeks or days, again depending on the view. In each view it is possible to set filters, this will make your display even clearer. Only with the relevant access rights you have access to the views "Planning", "Overviews" and "Vacation overview".
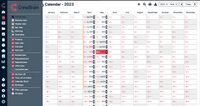
Annual view
Here you can see the whole year with all your entered events, jobs or even birthdays (depending on the defined settings). You can open each of these events by clicking on it and retrieve all the information or edit it depending on your access rights. If you want to create a job for a certain day, this is possible directly by clicking on the respective day.
You can control which entries are displayed in this view using the filter function.
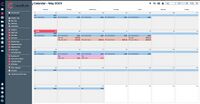
Monthly view
Here you can see your events and jobs on a monthly basis. If you move the mouse over a job, all relevant information is displayed directly. You can also deactivate the preview by mouseover at the bottom via "Customize month view". Click on the title of the job or click on 'Open job' if you want to have a closer look at the job or if you want to edit it. With one click the input mask of the job opens directly.
To create a job, click on the date you have selected. The input mask opens in which you can now plan your new job. You can control which entries are displayed in this view using the filter function.
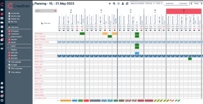
Weekly view
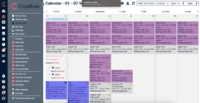
In the weekly view you can directly see some information about your jobs. You define which information this is via 'Customize week view'. You will find this function at the very bottom of the tab on the left. Here you can also decide whether a screen with more detailed information should appear when the mouse is moved over the respective job.
Clicking on the job opens the screen to edit it. It is also possible to create a job directly by clicking on the date. You can control which entries are displayed in this view using the filter function.
Bar view
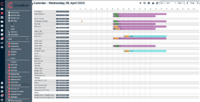
In the navigation, the bar view can be displayed from the perspective of employees, jobs, schedulers, project managers or time recording. In the day view, it offers an overview divided into hours in each case, which can be expanded to a weekly or monthly view. To change the view, click on "Week" or "Month" in the left menu under the "Bar View" section. It also shows how many bookings there are in this period for each employee and how many hours these bookings comprise (according to calculation).
You can control what appears in this view by setting filters. Via "Filter employees", it is also possible to filter for one or more individual employees.
If you move the mouse over an event, you will get its information. If you click on 'open job' or directly on the event, its screen will open and you can edit it - depending on your access rights.
Planning
Attention, this is a view for advanced users. It should be used only when you have already entered jobs and employees and know exactly how you want to work with the three levels (project, main job, subjob).
In this view you will see two axes. Depending on which filters are set, you will see the jobs on one side and the employees who are involved in them on the other. The axes can also be swapped.
With the colored background you can see easily which employees have been requested, registered or are available. Which ones have already been booked, who has declined, who is on vacation or sick and who is not available for the job.
If your jobs are on the horizontal axis, you can, as usual, open the mask of the job by clicking on it and - depending on the access rights - edit it. As an administrator, you can manage your employees directly for the jobs by clicking in the column of the respective employee. This opens a window where you can request the employee, enter him/her, book him/her directly or set him/her to unavailable. You can also select the category, make a preselection via the checkboxes if necessary and view or adjust the payment of Freelancers. The categories and the payment is based on the information in the master data. You can cancel an already requested or booked employee using this method.
If you switch the axes and the jobs are now on the vertical axis, you can again open and edit the job by clicking on it. As an administrator, you can again directly request, book or cancel the employees by going to the column of the employee in the respective job, as described above. If you click directly into the categories to be filled, the corresponding category will be preselected for the employee.
Again, which entries are displayed in this view can be defined using the filter function. Via "Filter employees", for example, it is possible to filter by one or more individual employees.
Overviews
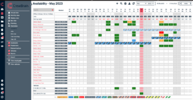
By default, you will get a monthly overview here, but you can set it to a desired time frame - by clicking on the dates. By setting the corresponding checkmarks in the overviews, you can display employees, freelancers, subcontractors, vehicles and rooms. Using the additional filters or the checkmark at "Assort" you can find what you are looking for even faster.
You can get the overview either in terms of availability, jobs, time recording or time off. There is also a grid view.
Availability
This is where you get a monthly overview of vacations/holidays, the number of jobs per day, the daily staff requirements and which employees, freelancers, subcontractors or vehicles are booked, available or requested for which job and when (depending on the filters set). The respective colored background indicates the status, as explained below in the caption. Regarding the jobs, the number of individual jobs on the respective date is displayed. If you click on the numbers with a grey background, the individual jobs are displayed. You can open their window by clicking on them again. This not only gives you its information, but also allows you to edit it (depending on access rights).
If you move the mouse over the individual jobs of employees, freelancers, subcontractors or vehicles, the title of the job is displayed. If you click on it, its screen for further information can be opened and edited (depending on the access rights).
You can add vacation for the respective employee as an administrator by clicking on a field that is not colored. You can differentiate between vacation, time off, school/training or sick leave (vacation categories can be defined under Administration > Vacation & Absence) and if desired, approved directly. The Freelancers can simply be set to "Not available".
Jobs
On the left you will find all jobs that are scheduled for the selected month. Jobs that are already fully scheduled are green, jobs which can still be modified are red. By clicking on the respective job you get its information and can edit it, if you have the required access rights.
Grid view
Here you get an overview of all resources and their daily jobs with the respective start and end times based on the job or the default times defined for the employee. The view is endless, so you can scroll into the future as you wish.
Time recording
This is where you see the working hours of each employee. The different colors are explained at the bottom of this view.
Time-Off
This view shows the time-off of your employees, freelancers and subcontractors. Any holidays entered in the system will be displayed at the top. As usual, you can control the selection by using filters. Via "filter employees", for example, it is possible to filter by one or more employees or by individual categories.
The color is explained at the bottom of the screen - depending on the selected view. You have the possibility to choose between "Status" and "Category" at the bottom of the screen. In the "Status" view, you can see the status of the leave request. In the "Category" view you can see if it is a vacation, a training or something else. You can choose different colors for these categories under Administration > Time-Off & Absence > Categories.
If you click on a colored field, the screen for editing the leave request opens, depending on your access rights. If you click on a field that is still empty, you can directly add holidays, time off, school/training or a sick note. For individual configuration of the leave categories go to Administration > Time off & Absence > Categories.
For each employee, the available number of leave days is displayed at the end of the table. These have to be defined in the base data before.
You also have the option of printing a monthly absence overview for each employee. In addition to the calendar overview, the print view contains a list which shows all absences in detail.
